How do I Enable Sales Tax Within QuickBooks Online?
Before transferring your orders through the Online Integration process, you will need to have your Sales Tax enabled in QuickBooks.
To Enable Sales Tax Within QuickBooks Online:
- In the left-hand navigation pane, go to Taxes and select Sales Tax. In some versions of QuickBooks Online Sales Tax is the only option.
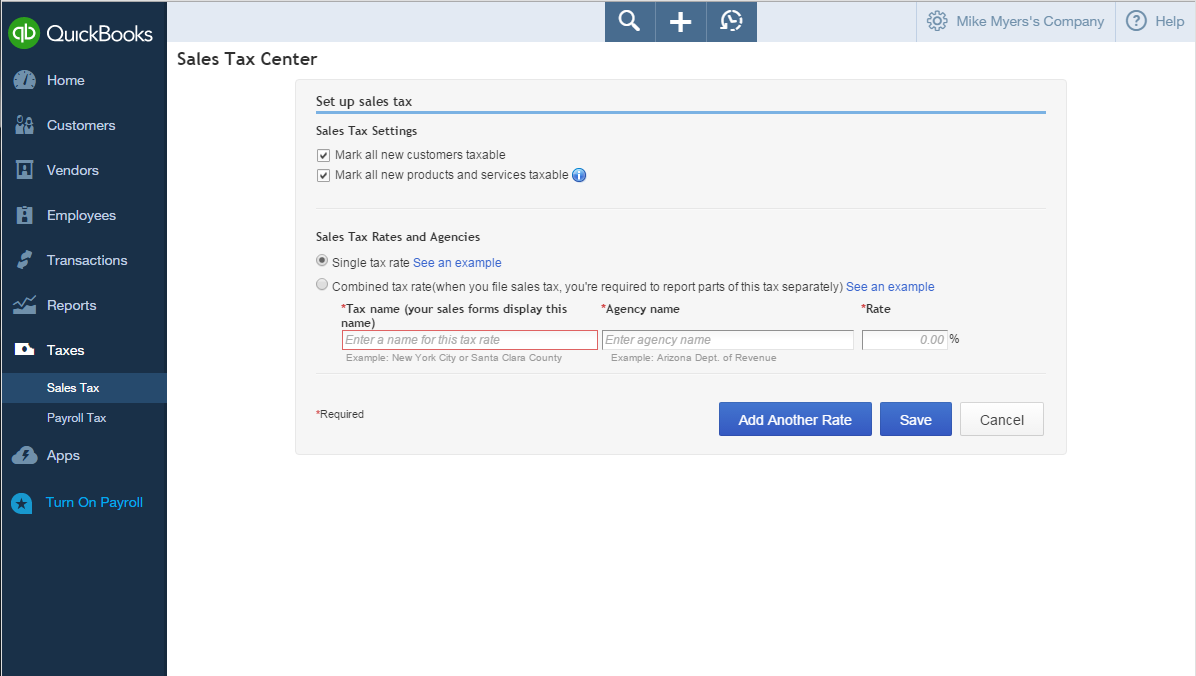
- The Sales Tax Center will appear
- If you have no sales tax rates set up, click the Set Up Sales Tax Rates button to create a new rate. If you already have sales tax rates set up, please see the section below titled, “Adding and Editing Rates“

- Next, add your rates and agencies. Click Save.
Adding and Editing Rates
- In the left-hand navigation pane, go to Taxes and select Sales Tax. In some versions of QuickBooks Online Sales Tax is the only option.
- In the right-hand navigation pane, you will see a blue box titled, “Related Tasks“. Click on Add/Edit Tax Rates and Agencies.
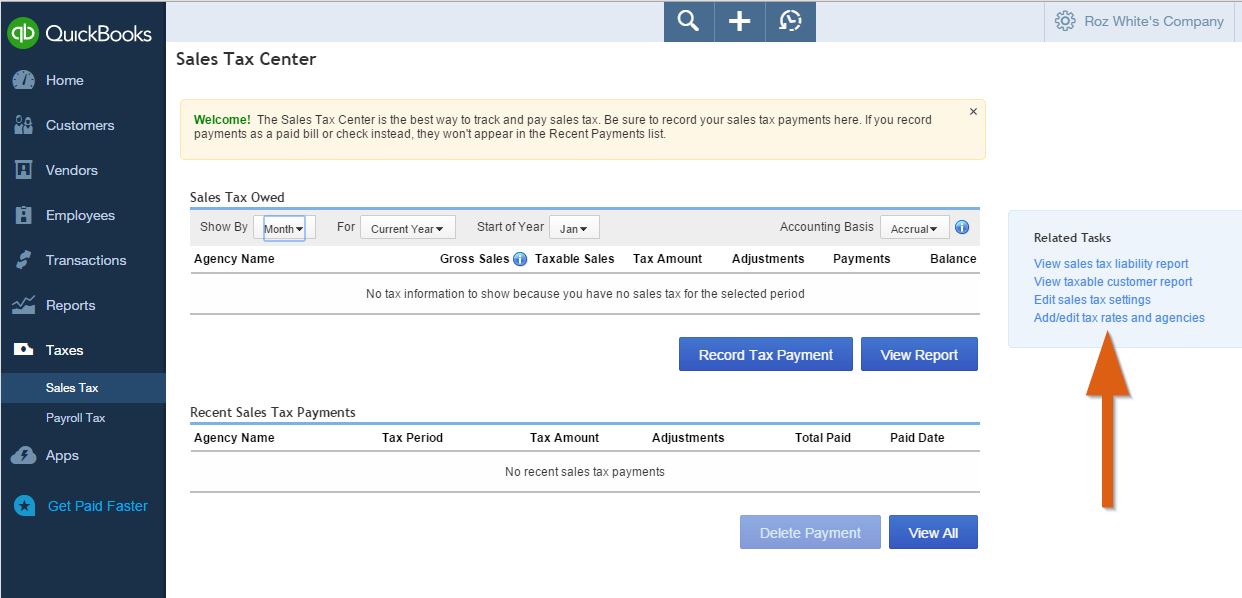
- Select the tax you would like to edit and click the Edit button OR, to create a new sales tax rate, click the New button.

To Setup a Sales Tax Combined or Group Rate:
- When creating a tax rate, select the Combined Tax Rate button. Fill in all the fields, with your separate rates under the Component section.

Once you’ve completed all of these steps, you can now continue on with the integration process. Click here to learn how to integrate QuickBooks Online with ServiceMonster: “How do I Integrate QuickBooks Online?”.